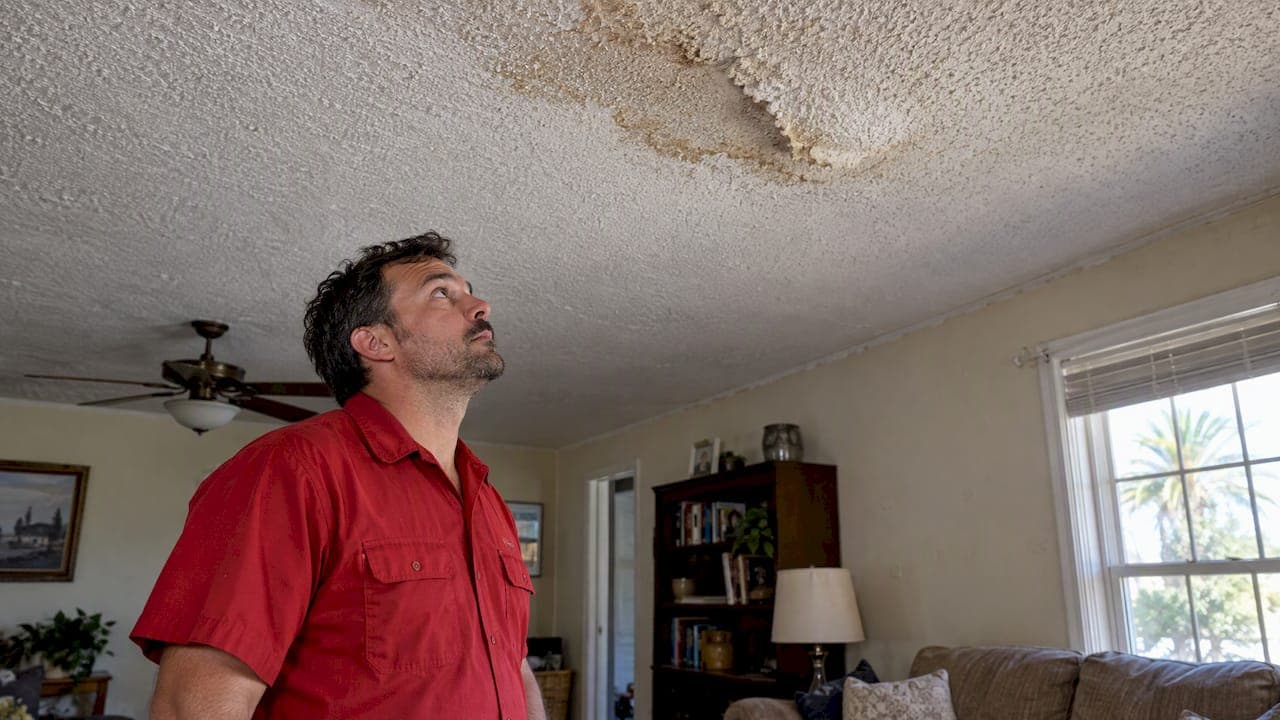

If your popcorn ceiling is wet, stop the water, document the damage, and dry or remove the affected material within 24 to 48 hours to avoid mold. If you suspect asbestos or structural failure, do not disturb the texture and call a licensed restoration contractor instead.
TL;DR:
- If your ceiling has been water-damaged, dry or remove affected materials within 24 to 48 hours to prevent mold growth, especially in porous materials like drywall and ceiling tiles.
- Testing for asbestos is crucial before disturbing popcorn texture on homes built before 1980, as it may contain hazardous fibers requiring professional abatement.
- Soft, sagging patches indicate structural failure and require professional inspection and repair rather than simple cleaning or patching.
- A thorough documentation of water damage, leaks, and drying efforts supports insurance claims and ensures proper remediation.
- DIY repairs are suitable only when the ceiling remains firm and dry, but extensive damage or asbestos presence warrants calling a licensed restoration contractor.
Table of Contents
- 1. How to inspect the ceiling for active leaks and soft spots
- 2. Stop the leak, document it, and dry everything within 48 hours
- 3. What to discard and when to test for asbestos
- 4. Repair paths: from a stain fix to full replacement
- 5. Finishing the repair and keeping it from happening again
- 6. When to call a licensed restoration contractor
- Our take on DIY ceiling repair versus calling a pro
- Request an inspection from Ready 2 Inspect
- FAQ
- Sources
1. How to inspect the ceiling for active leaks and soft spots
Before you touch anything, look for a wet sheen, active dripping, or a bulging and sagging patch. These are signs that water is still moving through the ceiling, not just sitting in a dried stain. Popcorn texture that has separated, flaked, or gone spongy under light pressure has already absorbed more water than it can hold.
Here’s how to check it safely:
- Shine a flashlight across the ceiling at an angle to spot a wet sheen or subtle bulge.
- Press gently with a gloved hand or the end of a broom handle to test whether the substrate feels soft or springy.
- Check the attic or the room directly above for pooling water, wet insulation, or a visible leak source.
- Photograph every affected area with your phone’s timestamp turned on, and jot down the date and time you first noticed it.
A soft, sagging patch means the drywall behind the texture is already failing, which is a structural problem rather than a cosmetic one.
2. Stop the leak, document it, and dry everything within 48 hours
Containment comes first. Shut off the water supply to the fixture or line involved, place buckets under active drips, and lay tarps over furniture or flooring below the damaged ceiling. If the leak is coming from a pipe you can’t isolate yourself, call a plumber immediately rather than waiting to see if it stops.
Once the water source is controlled, work through drying in this order:
- Remove standing water with a wet vac, and wipe down any wet surfaces you can reach.
- Run dehumidifiers and fans only if the electrical system in that area is confirmed safe, since water and wiring are a dangerous mix.
- Open windows when the outdoor humidity is lower than indoors to help the air exchange.
- Photograph the damage again once drying equipment is running, and keep a written log of what you did and when.
According to the CDC’s mold cleanup guidance, drying your home and everything in it within 24 to 48 hours is the single most important step to prevent mold growth after a water event. That window is tight, so speed matters more than a perfect cleanup on day one.
Before anything gets permanently removed, contact your insurer and keep a running list of damaged items. Acting fast on drying does not mean skipping documentation. The two happen at the same time.
3. What to discard and when to test for asbestos
Not everything that got wet can be saved, and the EPA’s guidance draws a clear line. Porous materials that cannot be fully dried within 24 to 48 hours should be discarded rather than dried in place, because trapped moisture inside drywall or ceiling tile becomes a hidden reservoir for mold even after the surface looks dry. The EPA’s commercial remediation guide lists ceiling tiles and drywall specifically as discard-and-replace materials once they’re wet and moldy.
Before you cut into any popcorn texture, consider the age of your home. If it was built before 1980, treat the ceiling as a possible asbestos material until proven otherwise.
- Collect a small sample from an inconspicuous area and send it to an accredited lab for testing, following the guidance on sampling popcorn ceiling texture.
- If asbestos is confirmed, stop all DIY work and hire a certified abatement contractor.
- For any disturbance of texture you’ve confirmed is asbestos-free, wear at minimum an N95 respirator.
- For heavier scraping or demolition, step up to a half or full-face respirator with P100 filters plus disposable protective clothing.
Pro Tip: If you’re not sure how old your home’s ceiling texture is, treat the first sample like a yes until the lab says otherwise. It costs far less than a cleanup mistake.
4. Repair paths: from a stain fix to full replacement
Once the area is dry and you’ve confirmed the material is safe to work with, the right fix depends on how deep the damage goes.
A stain-only fix works when the drywall itself is still firm and the texture hasn’t separated. Clean the area, let it dry completely, and seal the stain with a stain-blocking primer before repainting. Skipping the primer is the most common reason a water stain bleeds back through fresh paint weeks later.
When the substrate is soft, crumbling, or the stain keeps reappearing, cosmetic fixes aren’t enough. Partial replacement is the next step:
- Cut out the damaged drywall back to solid material, following the framing as a guide.
- Inspect the exposed framing for rot or lingering moisture before closing it back up.
- Install new drywall, tape the seams, apply joint compound, sand, and prime.
- Match or reapply texture so the patch blends with the surrounding ceiling.
For readers tackling this themselves, a drywall ceiling repair guide walks through common cracks, holes, and sagging fixes in more detail.
If the damage covers a large portion of the ceiling, full removal and retexturing, or covering the old surface with new drywall or ceiling panels, often makes more sense than patchwork repairs, though it takes longer and costs more.
Call a licensed restorer instead of continuing on your own when you see:
- Visible mold growth or a persistent musty smell.
- Sagging that suggests the framing itself is compromised.
- Moisture spread across a wide area rather than one isolated spot.
- Confirmed asbestos or an insurance claim that’s getting complicated.
5. Finishing the repair and keeping it from happening again
Once your patch or new drywall is in place, apply a stain-blocking primer before any topcoat, even if you don’t see a visible stain. Hidden moisture can still bleed through plain paint.
After that, a few habits go a long way toward preventing a repeat:
- Walk your roof line and flashing after major storms, especially around vents and chimneys.
- Check visible plumbing connections under sinks and around water heaters every few months.
- Keep attic ventilation clear so moisture doesn’t build up above the ceiling.
- Add or check insulation where gaps let warm, moist air condense against cold surfaces.
6. When to call a licensed restoration contractor
Some jobs go beyond what a weekend DIY project should handle, especially once mold, structural softness, or an insurance claim enters the picture. I have Florida licenses as a mold assessor and remediator, InterNACHI certification, and I spent close to a decade as a home inspector before starting my restoration services company. We serve twenty-five cities across Seminole, Orange, Volusia, and Lake counties.
A licensed contractor brings a few practical advantages over tackling it piecemeal:
- One company handles inspection, lab testing, remediation, and the rebuild, so nothing falls through the cracks between separate contractors.
- You get documented moisture readings and photos that support an insurance claim rather than just a verbal opinion.
- The same team that removes damaged material is accountable for putting it back correctly.
A proper inspection includes moisture mapping, a visual check for mold, and a written report you can hand to your insurer.
Our take on DIY ceiling repair versus calling a pro
Most advice on this topic treats the 24 to 48 hour drying window as a suggestion. It isn’t. It’s the difference between a stain you prime over once and a ceiling cavity that grows mold behind fresh paint for months before anyone notices. If you remember one thing from this guide, make it that window.

The other place conventional advice falls short is the asbestos conversation. A lot of guides mention testing almost as an aside. We’d put it earlier than that. Scraping a popcorn ceiling before you know what’s in it is the single riskiest step in this entire process, and it’s also the easiest one to slow down and do right.
Where DIY makes sense is the simple stuff: a dry, firm ceiling with a clean stain and no structural softness. Past that, the math changes fast once you add up lab fees, materials, and the hours spent getting a texture match right. That’s usually the point where a licensed contractor costs less than it looks like on paper.
— John Foutz
Request an inspection from Ready 2 Inspect
If you’d rather have a licensed team handle the inspection, testing, and repair in one pass, we’re set up to do exactly that. We offer free mold inspections, water damage restoration, mold remediation, and full reconstruction, and we manage the insurance claim alongside the physical work so you’re not coordinating three separate companies.

Before you call, it helps to have a few things ready:
- Photos and timestamps of when you first noticed the damage.
- A rough timeline of when the leak started and whether it’s been stopped.
- Notes on any temporary fixes you’ve already made, like buckets or a tarp.
The owner answers the phone and comes out to look at the job personally. If you’re in our service area, you can get started here or check coverage for your city, including Lake Mary and Orlando.
FAQ
Does homeowners insurance typically cover water damage to a ceiling?
Standard HO-3 policies generally cover sudden, accidental water damage, such as a burst pipe or storm-related roof failure, according to insurance industry guidance. Damage from long-term neglect or gradual seepage is typically excluded, so documenting when the leak started matters for your claim.
How long does it take for a water damaged ceiling to dry out?
CDC guidance recommends drying water-damaged materials within 24 to 48 hours to prevent mold growth. If a popcorn ceiling or the drywall behind it can’t be fully dried in that window, the material should be discarded rather than dried in place.
How long does it take for popcorn ceiling repair to dry?
Drying time depends on the repair: joint compound typically needs to dry between coats before sanding, and primer needs to cure fully before painting. Higher humidity slows this process, so give repairs extra time in damp conditions rather than painting on a fixed schedule.
Can I paint over water stains on a popcorn ceiling?
Only after the area is completely dry and sealed with a stain-blocking primer, since paint alone won’t stop a stain from bleeding through. If moisture is still trapped behind the surface, painting over it hides the problem instead of fixing it and can mask mold growth underneath.
Sources
- Brief Guide to Mold, Moisture, and Your Home | US EPA
- Homeowner’s and Renter’s Guide to Mold Cleanup After Disasters | CDC