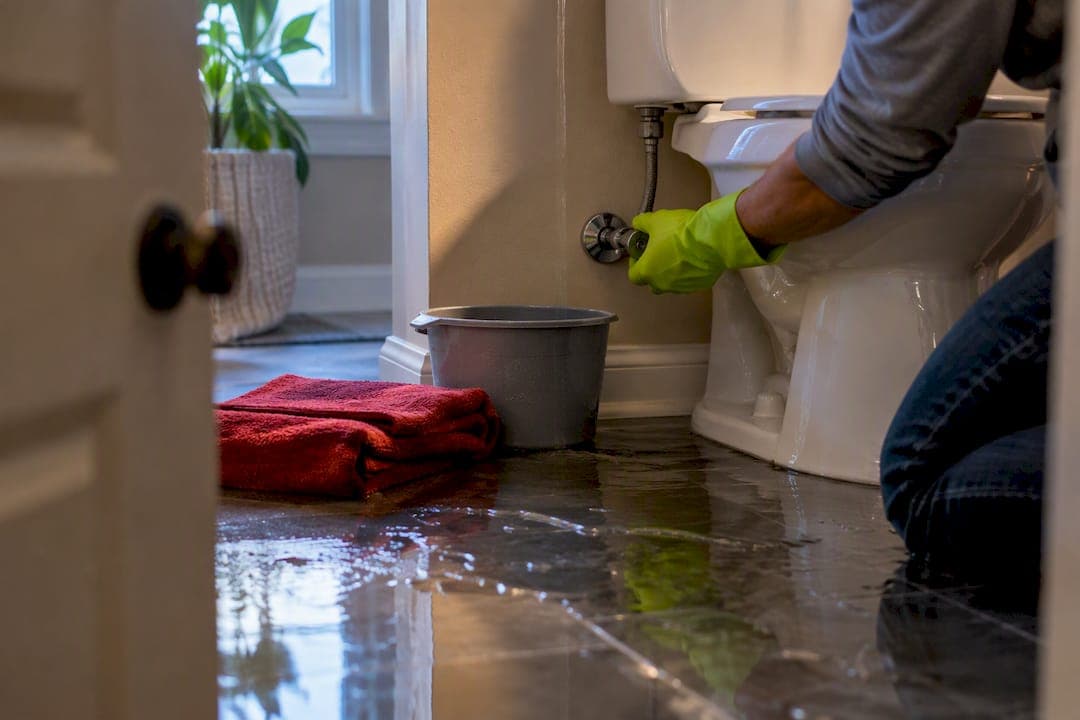

Stop the water immediately. If it contacted the bowl or came from a drain, treat it as a biohazard and call a licensed restoration company. If it’s clean tank water only, you can safely remove it, disinfect the area, and dry everything promptly, ideally within a day or two.
TL;DR:
- Only contaminated water from a sewer or drain overflow requires professional cleanup, as it poses serious biohazard risks, especially if it involves sewage.
- Turning off the water supply and assessing contamination levels quickly helps prevent further spread and guides proper disinfection procedures.
- Use appropriate disinfectant ratios, with one cup of bleach per five gallons of water for non-porous surfaces, and avoid mixing bleach with other cleaning products.
- Porous materials soaked with contaminated water, such as drywall or carpet padding, typically cannot be dried safely and should be discarded.
- Call a professional immediately if the water involved sewage, reached other floors or electrical systems, or if it remains undried after 48 hours.
Table of Contents
- Stop the overflow immediately
- Assess contamination: clean, gray, or sewage
- Contain and remove standing water safely
- Disinfecting and cleaning surfaces
- Drying, mold risk, and what to inspect after cleanup
- PPE and health precautions for DIY cleanup
- When to call a professional restoration company
- Practitioner perspective: what matters most on arrival
- Owner-first checklist and quick pro triage notes
- Ready 2 Inspect: owner-led restoration and how to reach us
- Primary sources and further reading
- Sources
- FAQ
Stop the overflow immediately
Every minute counts once water starts spreading across the floor. Here’s the order to work in:
- Turn the shutoff valve behind the toilet clockwise until it stops. This is usually a small oval handle low on the wall or floor near the base.
- If the valve is broken, stuck, or missing, lift the tank lid and press the flapper down by hand or raise the float arm to stop the tank from refilling.
- If water is near outlets, power strips, or anything electrical, shut off the breaker for that area before you do anything else, and don’t stand on wet flooring near a live circuit.
Once the water is off, you have a moment to breathe before deciding what kind of cleanup you’re actually facing.
Assess contamination: clean, gray, or sewage
Not every overflow is the same problem. The water’s contact history tells you how to handle it.
- Category 1 (clean): Water from a supply line or tank that never touched the bowl. Low risk, safe to handle without special gear.
- Category 2 (gray): Water with some contamination, such as runoff that picked up soap residue or sat for a while. Moderate risk.
- Category 3 (sewage): Any water that touched the bowl, came up through a drain, or backed up from a sewer line. This is a biohazard, according to CDC guidance on natural disaster safety, and it calls for professional cleanup rather than a DIY approach.
A quick check helps you sort it fast: does it smell like sewage, are there visible solids, and has the toilet backed up before? Any yes points toward Category 3.
Contain and remove standing water safely
Once you know what you’re dealing with, move fast on containment before the water spreads further.
- Lay towels or a rolled barrier at doorways to stop water from reaching hallways or other rooms.
- Pull up rugs, bath mats, or anything porous sitting in the water right away. These items hold moisture and contamination longer than hard flooring.
- Extract standing water with a wet vacuum built for liquids, or use a bucket and mop if that’s what you have. Never run a household vacuum on wet surfaces. It isn’t built for it and can shock you.
- Bag heavily soiled towels, rags, and disposable materials separately, and pour wastewater down a toilet or utility drain rather than a sink used for dishes or hands.
Pro Tip: Keep a separate bucket just for wastewater disposal so you’re not carrying contaminated water past clean areas of the house.
Disinfecting and cleaning surfaces
Cleaning comes before disinfecting, always. A surface still coated in debris won’t get properly sanitized no matter how strong the bleach mix is.
- Remove any remaining debris or residue with a cloth or paper towel.
- Wash the surface with a regular detergent and rinse it.
- Apply a bleach solution: 1 cup (240 mL) of regular unscented bleach per 5 gallons of water works for sanitizing non-porous surfaces, while 1 cup of bleach per 1 gallon of water is the ratio for scrubbing rougher surfaces, according to CDC bleach guidance. Letting the solution air dry rather than wiping it away right away gives it time to work.
- Never mix bleach with ammonia or other cleaning products. The combination produces dangerous fumes.
- Open windows or run a fan for ventilation while you work, and skip the bleach on surfaces it can damage, like natural stone or certain finished woods, in favor of a manufacturer-approved disinfectant instead.
The 1-cup-per-5-gallon ratio is the same one used for general disinfecting during large-scale cleanups, which tells you this isn’t a made-up home remedy. It’s the same dilution health agencies rely on after floods.
Drying, mold risk, and what to inspect after cleanup
Time is the biggest factor working against you now. According to EPA guidance on mold, drying materials within 24 to 48 hours greatly reduces the risk of mold growth, and keeping indoor humidity in a moderate range helps hold that gain.
- Run a wet vacuum or mop until no standing water remains before you bring in drying equipment.
- Increase airflow with open windows or fans, but only once you’re sure the water was Category 1. On gray or black water, blowing air around can spread contaminants before you’ve disinfected.
- Check under baseboards, around the base of the toilet, and into any nearby subfloor access for moisture that isn’t visible from the surface.
- Porous materials that stayed wet with contaminated water, such as carpet padding or soaked drywall, generally need to be discarded rather than dried, since EPA guidance notes these materials usually can’t be restored to a safe standard once they’ve absorbed sewage.
PPE and health precautions for DIY cleanup
Sewage exposure carries real infection risk, so gear matters even for a cleanup that feels small.
- Wear waterproof gloves, rubber boots, and eye protection or a face shield any time you’re handling Category 2 or 3 water.
- Add liquid-repellent coveralls if you’re dealing with sewage backup, following the same precautions outlined by the CDC for biohazard exposure.
- Remove contaminated clothing before you go anywhere else in the house, and wash it separately from your regular laundry.
- Disinfect boots and tools before storing them, and wash your hands thoroughly as soon as you’re done, a habit the CDC recommends for anyone who handles human waste.
- See a doctor if you develop stomach illness, skin irritation, or unexplained fever after cleanup. Sewage handling isn’t something to shrug off if you start feeling unwell.
When to call a professional restoration company
Some situations are past the point where mop, bleach, and a fan will fix things.
- Any Category 3 sewage overflow, full stop.
- Water that traveled to another floor, soaked a ceiling, or reached electrical systems.
- Structural materials, like subfloor or drywall, that stayed wet.
- Contamination spread over more than about 10 square feet, a threshold EPA guidance uses to separate homeowner-manageable mold jobs from ones that need professional remediation.
- Inability to fully dry the area within the 24 to 48 hour window.
A restoration crew typically handles containment, removes anything that can’t be salvaged, applies HEPA filtration and biocide treatment, runs structural drying equipment, and manages the rebuild alongside your insurance claim. Photograph the damage immediately, note timestamps, and keep any receipts for cleanup supplies. That documentation makes the difference between a claim that gets questioned and one that moves smoothly.
Practitioner perspective: what matters most on arrival
When a restoration company walks in, the first job isn’t cleanup. It’s confirming the water source, deciding what gets removed versus dried, and laying out cost and insurance expectations before anything gets torn out. Owner-led inspection catches hidden moisture that a rushed walkthrough misses, since John Foutz, who holds Florida licenses as both a mold assessor and remediator and is InterNACHI certified, has spent years learning where water actually travels inside a wall. Homeowners should expect a clear scope and a documented plan before demolition starts, not after.

Owner-first checklist and quick pro triage notes

Here’s how I’d want a homeowner to move through this, in order: stop the water, protect anything valuable nearby, call a professional if the water is sewage or came from an upstairs overflow, photograph everything before you touch it, and avoid tracking contamination into clean rooms while you wait.
On our end, triage always starts with safety, then verifying the water source, then containment, and only then do we document a scope and put a plan in front of the homeowner. Skipping that order is how small jobs turn into bigger ones.
— John Foutz
Ready 2 Inspect: owner-led restoration and how to reach us
A sewage overflow or a slow-drying room doesn’t need a call center transfer, it needs someone who shows up and tells you exactly what’s happening. Ready 2 Inspect Mold Services handles water damage restoration, mold remediation, and full reconstruction under one roof, so the same licensed company that removes damaged drywall is the one that closes it back up.

- Call us if your overflow involved sewage, reached a ceiling below, or hasn’t dried within 48 hours.
- A mold inspection can include moisture readings, visual assessment, and a documented plan before any work starts.
- Jobs may include upfront pricing and insurance coordination handled directly by the restoration service provider.
If you’re dealing with standing water or a lingering odor after an overflow, schedule a free mold inspection and we’ll walk you through what’s actually happening behind the wall.
Primary sources and further reading
Guidance above draws on CDC bleach sanitation guidance, EPA mold course chapter 9, and IICRC water restoration standards.
Sources
FAQ
Is an overflowing toilet a biohazard?
It depends on what the water touched. Water that contacted the toilet bowl or came up through a drain is Category 3 and counts as a biohazard under CDC guidance, while clean tank water alone is low risk.
Can you put bleach in a toilet overflow tube?
The overflow tube inside the tank is part of the clean water supply system, not the contamination pathway, so bleach isn’t typically applied there during cleanup. Focus disinfection on surfaces the contaminated water actually touched, using the CDC’s bleach dilution ratios.
Will toilet overflow cause mold?
Mold risk rises sharply if materials stay wet, since drying within 24 to 48 hours greatly reduces that risk according to EPA guidance. Once that window passes without full drying, hidden moisture can settle into subfloors and wall cavities.
Is it safe to pour vinegar into the toilet’s overflow tube?
Vinegar isn’t part of standard overflow cleanup guidance and isn’t a substitute for the bleach dilutions recommended for disinfecting contaminated surfaces. Stick to detergent followed by a proper bleach solution on affected areas rather than experimenting with the tank’s overflow tube.